Usage (Hog/Do Script)#
The Hog/Do script is a versatile tool designed to assist in managing hardware design projects and workflows. This chapter provides an overview of the available directives and options, and their usage. A typical execution of the Do command is therefore:
./Hog/Do [<options>] <DIRECTIVE> <PROJ_NAME>
You are not obliged to use the Hog/Do script, except that for creating the project. Once this is create you can open the project with the standard IDE tools, and work in your preferred environment (e.g. with a graphical interface).
Directives#
Directives determine the primary action that the Hog/Do script will perform. The available directives are case-insensitive:
CREATEorC: Create the project, replacing it if it already exists.WORKFLOWorW: Launch the complete workflow, creating the project if it does not exist.CREATEWORKFLOWorCW: Create the project (even if existing) and launch the complete workflow.SIMULATEorS: Simulate the project, creating it if it does not exist.IMPLEMENT: Run the implementation only. The project must already exist and be synthesized.SYNTHESIS: Run the synthesis only, creating the project if it does not exist.LISTorL: Only list all the projects.XMLorX: Copy, check or create IPbus XMLsHELPorH: Display the help screen.
By “building” or “workflow” we mean the complete build of the project: IP synthesis, Synthesis, Implementation, and binary file generation.
Command Options#
The Hog/Do script supports several command-line options that modify its behaviour. Each option can be used to customize the execution of the script:
-no_bitstream: If set, the bitstream file will not be produced.-recreate: If set, the project will be re-created if it already exists.-no_reset: If set, runs (synthesis and implementation) won’t be reset before launching them.-check_syntax: If set, the HDL syntax will be checked at the beginning of the workflow.-njobs <value>: Specifies the number of jobs. The default is 4.-ext_path <path>: Sets the absolute path for external libraries.-lib <path>: Specifies the compiled simulation library path.-synth_only: If set, only the synthesis will be performed.-impl_only: If set, only the implementation will be performed. This assumes synthesis was already done.-simset <sets>: Defines simulation sets, separated by commas, to be run. Effective only for theSIMULATEdirective.-all: List all projects, including test projects. Test projects have #test on the second line of hog.conf.-generate: For IPbus XMLs, it willk re create the VHDL address decode files.-xml_dir <path>: For IPbus XMLs, set the destination folder (default is../<project_name>_xml).-verbose: If set, the script will be launched in verbose mode.
Custom Hog Commands#
Starting in version 2025.1, the Hog/Do script supports the ability to add custom commands. These commands are defined in the /hog-commands directory and must be .tcl files. Hog will automatically detect and add these .tcl files as commands to the list of available commands.
For example, if you have:
/hog-commands
    /my_command.tcl
with the contents:
#my_command.tcl
puts "Hello from my command!"
You will now see the following when running ./Hog/Do HELP:
** Directives (case insensitive):
- CREATE or C: Create the project, replacing it if already existing.
- WORKFLOW or W: Launches the complete workflow, creates the project if not existing.
- CREATEWORKFLOW or CW: Creates the project -even if existing- and launches the complete workflow.
- SIMULATE or S: Simulate the project, creating it if not existing.
- IMPLEMENT: Runs the implementation only, the project must already exist and be synthesised.
- SYNTHESIS: Runs the synthesis only, creates the project if not existing.
- LIST or L: Only list all the projects

** Custom Commands:
- MY_COMMAND: runs /path/to/repo/hog-commands/my_command.tcl
And can execute the custom command with:
./Hog/Do MY_COMMAND

INFO: [Hog:Msg] Running custom script: /path/to/repo/hog-commands/my_command.tcl
Hello from my command!
INFO: [Hog:Msg] Done running custom script...
Tip
Custom commands have full access to the functions available in the Hog.tcl.
Usage Examples#
Create a project#
To create a new project (or replace an existing one):
./Hog/Do CREATE MyProject
Creating a Project and Launching Workflow#
To create a new project (or replace an existing one) and launch the complete workflow:
./Hog/Do -recreate WORKFLOW MyProject
or
./Hog/Do CREATEWORKFLOW MyProject
The project will be created in Projects/MyProject.
These directories should be ignored in the .gitignore file to avoid to accidentally commit the to the repository.
Simulating a Project (Vivado-only)#
To simulate an existing project, creating it if not existing:
./Hog/Do SIMULATE MyProject
Project simulation can be run using shell, Vivado GUI or Vivado Tcl console.
The simulation files and properties, such as the selected simulator, possible wave files or do files are set as explained in the section Simulation list files.
If a simulator different from Vivado Xsim is used, the Vivado libraries must be compiled by the user in a directory. They can be compiled using the shell command Hog/Init.sh or by using the Tcl commands Hog/Tcl/utils/compile_simlib.tcl.
If this command is used, the simulation libraries will be stored into ./SimulationLib.
Running Synthesis Only#
To perform synthesis on an existing project or create it if not existing:
./Hog/Do SYNTHESIS MyProject
Listing Projects#
To list the projects in the repository:
./Hog/Do LIST
Warning
Test projects are hidden in the list, to keep the repository tidy. If you wish to visualise all the projects in the repository run:
./Hog/Do LIST -all
Displaying Help#
To view the help screen:
./Hog/Do HELP
Running the workflow using Vivado/Quartus GUI#
In a Hog handled project, the HDL workflow can always be run normally from the IDE (Vivado, Quartus) GUI, Hog integrated scripts will run automatically.
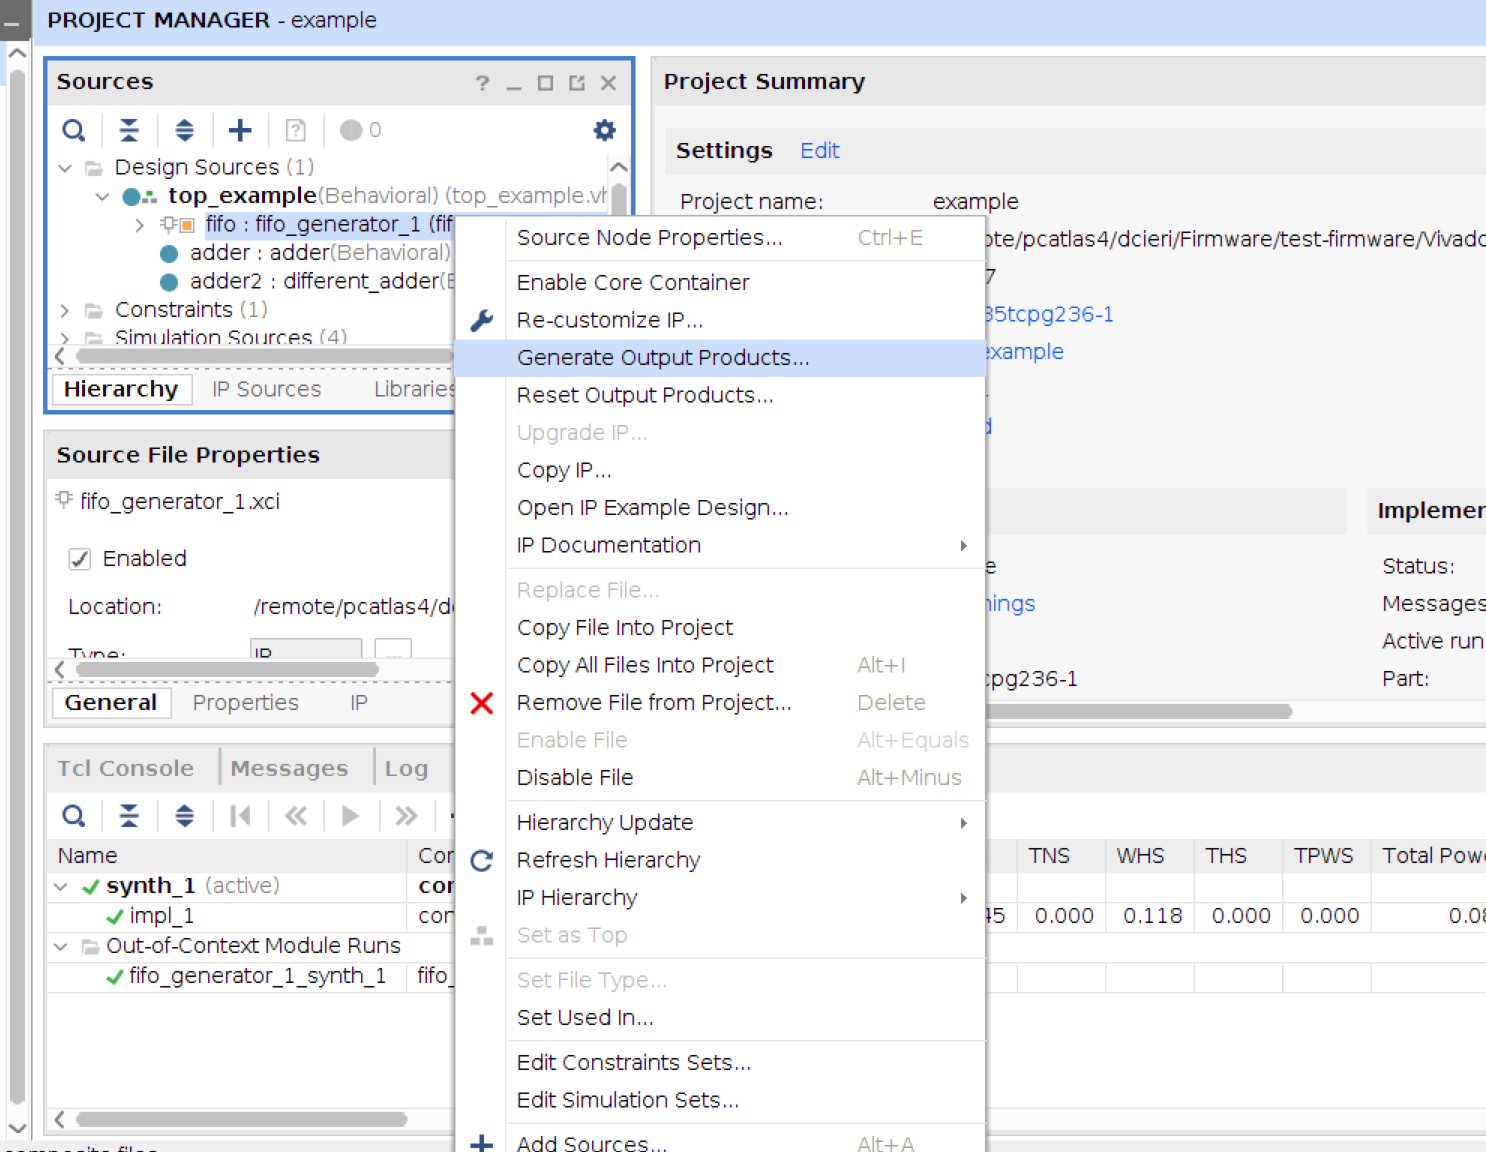
To run the IP synthesis, for example, right click on each IP and click the “Generate Output Products” button.
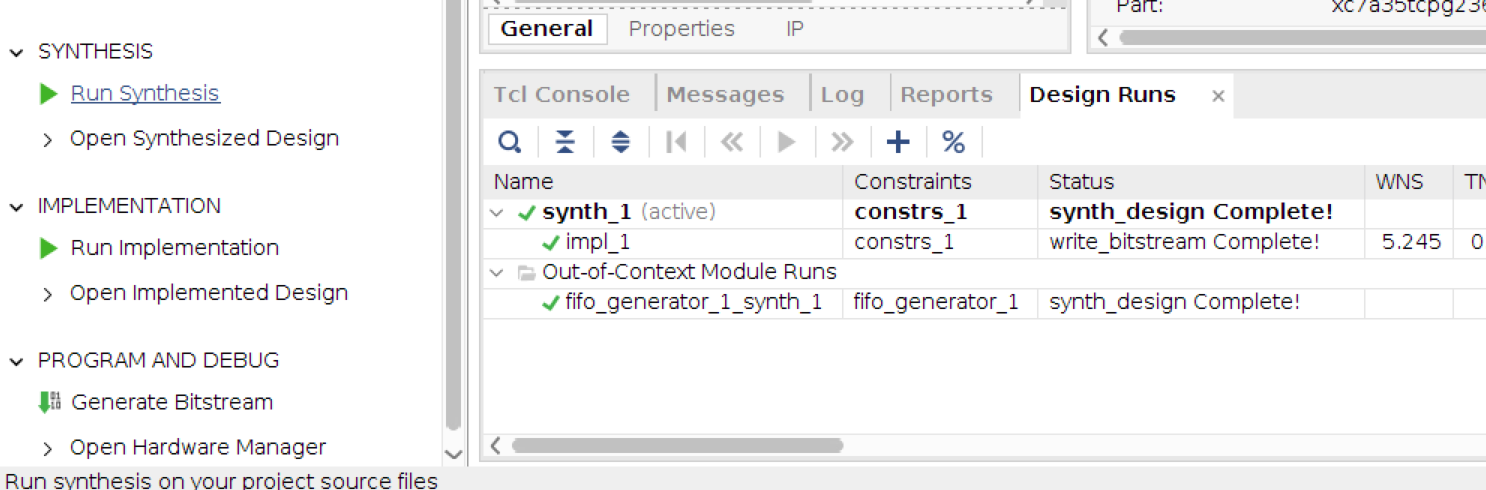
To synthesise the project, click on “Run Synthesis” button (on the left).
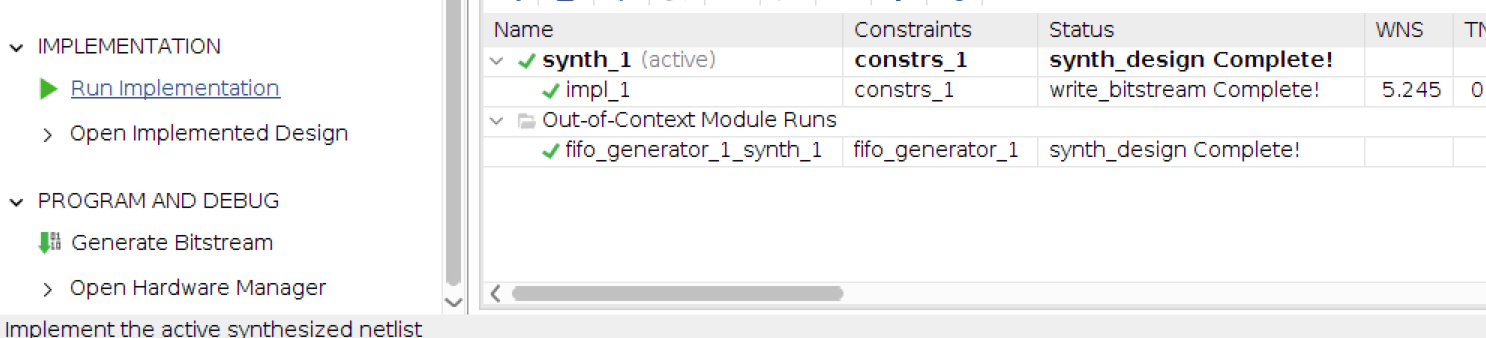
Finally, click on “Run Implementation” and “Generate Bitstream” buttons (on the left).
Note
Under Quartus always run a full compilation flow after recreating a project. Running a single module will cause errors due the Hog generics not being set to any value[1].
Collecting workflow products#
After the HDL workflow is completed, Hog will automatically copy many relevant files to the bin directory in the root of your repository. This folder should be ignored by git by means of the .gitignore file.
The files copied into the bin directory are:
The binary files (
.binand.bit) properly renamed according to thegit describe(optional) The
.ltxILA files (if ILA cores are used in the project)All the reports produced during synthesis and implementation
(Vivado only) All the
runme.logfiles produced during synthesis and implementation. They will be renamed according to the run name(optional) All the IPbus XML files used in the project listed in the
.ipblist filesA
versions.txtfile containing all the values of versions, SHAs, time, date that are passed to the top module of the project(Vivado only) In the HOG-CI (or if you launch the workflow with the script) a timing file containing the timing values of the project (WNS, TNS, WHS, THS). The file is called
timing_ok.txtif all the timing requirements were met, otherwise it is calledtiming_error.txt.
Simulating with Vivado GUI#
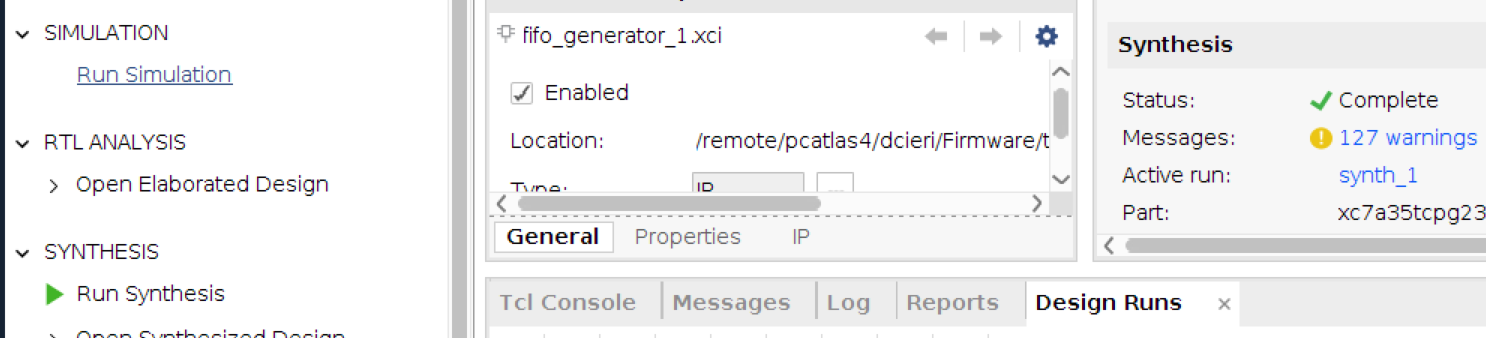
Using the GUI, you can run only one simulation set at the time. First of all select the simulation set you want to run, by right clicking on simulation set name in project sources window.
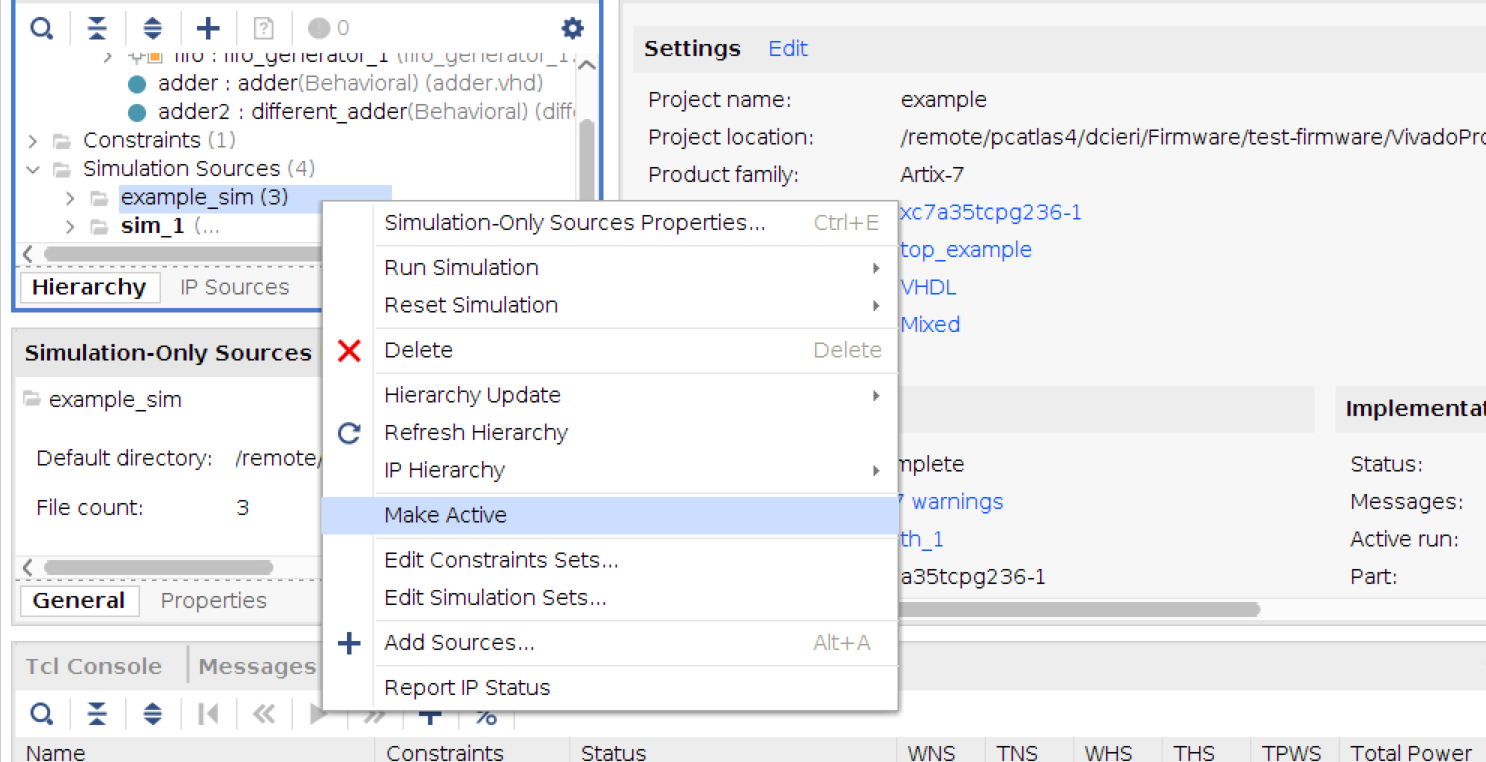
Then click on “Run Simulation” button (on the left). Note that using the GUI, Vivado or Quartus will use the simulation software specified in your project hog.conf file.