
Hog-CI with GitHub Actions#
Setting up Hog CI with GitHub Actions#
On GitHub repository, Hog Continuous Integration makes use of the GitHub Actions framework. Both the GitHub repository and your local area must be set-up to work properly with Hog CI. In this paragraph, we assume that we are working with a GitHub Project called MyProject under the GitHub group MyGroup. Please, replace these with the actual names of your project and group.
Preliminary requirements#
To run the Hog-CI, you need a GitHub service account, which will actually run the CI. We suggest to create an another account on GitHub.com and give it maintainer permissions.
Set up your personal GitHub Actions Workflow YAMLs#
GitHub Actions uses YAML configuration files to define which commands it must run. These files should be stored inside the .github/workflows directory of your repository. Hog cannot provide full YAML files for your project, but templates file can be found under Hog/Templates/github-pull.yml , Hog/Templates/github-main.yml, and [Hog/Templates/github-tag.yml] as a reference. These two files are required to configure the Merge Request, Main and Tag pipelines.
Pull Request Pipeline YAML configuration#
For example, suppose we want to write the Yaml configuration files to run the Hog project my_project on the CI. This file will actually include the Hog hog-pull.yml configuration file, where the CI stages of the pull pipeline are defined. An example .github/workflow/hog-pull.yml looks like:
name: Pull

# Select here the target branch of the pull request, which should run the pipeline
on:
  pull_request:
    branches: [master, main, develop, release]

jobs:
  hog-workflow:
    # Here you can change the hog version
    uses: hog-CERN/Hog/.github/workflows/Hog-pull.yml@Hog2024.2
    secrets:
      HOG_PUSH_TOKEN: ${{ secrets.HOG_PUSH_TOKEN }}
      HOG_EMAIL: ${{ secrets.HOG_EMAIL}}
      HOG_USER: ${{ secrets.HOG_USER}}
      HOG_PATH: ${{ secrets.HOG_PATH}}
      HOG_XIL_LICENSE: ${{ secrets.HOG_XIL_LICENSE }}
    with:
      BUILD_PROJECTS: >-
        ["my_project"]
      SIM_PROJECTS: >-
        ["my_project"]
      HOG_USE_DOXYGEN: True
      HOG_CHECK_SYNTAX: True
      HOG_NO_RESET_BD: True
      HOG_CHECK_PROJVER: True
      HOG_NO_BITSTREAM: False
      HOG_PR_MSG: '1'

# This allows Hog to cancel pipelines, if a new commit is pushed to the same pull request branch
concurrency:
  group: ${{ github.workflow }}-${{ github.event.pull_request.number || github.ref }}
  cancel-in-progress: true
In the on: pull_request: section you can define the target branches for which you want your CI to run. In the example above, the CI will run for each PR targetting the master, main, develop, and release branches of your repository.
Here you can select the version of Hog you want to use by changing Hog2024.2 to your favourite release in the line:
uses: hog-CERN/Hog/.github/workflows/Hog-pull.yml@Hog2024.2
The version of Hog MUST be specified. If you fail to do so, the CI will pick up the parent configuration file from the latest Hog master branch. This is discouraged, since Hog development could lead to not back-compatible changes that could break your CI.
Now, you need to define the projects you which to build and/or simulate in the CI. In the code snippet above we are running only the example project, but you can run as many projects as you wish, adding them to the list, in the following way:
    with:
      BUILD_PROJECTS: >-
        ["proj1", "proj2", "proj3"]
      SIM_PROJECTS: >-
        ["proj1", "proj2", "proj3"]
Secrets and Inputs#
A set of environmental variables shall be given to the Hog workflow to operate. These are passed as inputs or secrets. Input values can be written directly in your YAMLs, since they do not include any sensitive informations, for which we suggest to use GitHub secrets, which can be added in the following way:
Go to https://gitlab.com/MyGroup/MyProject/settings/secrets/actions
Click on
New Repository Secretbutton for each variable to add
Inputs and secrets can then be defined in your YAML, with the following syntax
    secrets:
      MYSECRET: ${{ secrets.MYSECRET }}
    with:
      MYINPUT: "input_value"
This is the list of secrets for the merge request pipeline:
| Name | Required | Value |
Name |
Required |
Value |
|---|---|---|
|
NO |
Set the EOS instance. If your EOS storage is a user storage use |
|
NO |
The password of your CERN service account (should be masked). Only required if you are using the EOS storage cloud space. |
|
NO |
The name of your CERN service account . Only required if you are using the EOS storage cloud space. |
|
NO |
External path to be passed to your Apptainer execution. |
|
NO |
Path to your |
|
NO |
Project develop branch. If defined, pull request should start from this branch. For more information see the Hog versioning chapter. |
|
YES |
Your service account’s email address (e.g. service_account_mail@cern.ch). |
|
NO |
If specified, entries in the |
|
NO |
If this variable is set to |
|
NO |
The path where to store the IP generated results. If not set, the CI will synthesise the IPs each time. If the path starts with |
|
NO |
If set, the defined path will be added to the default |
|
YES |
The |
|
YES |
The push token you generated for your service account. It can be generated from https://github.com/settings/tokens, and should have project, repo and workflow rights. |
|
NO |
All the files (or wildcards) contained in this variable (separated by spaces or new lines) be reset at the pre-synthesis time by Hog-CI. |
|
NO |
A comma-separated list of simulation sets, to be run by the CI for the chosen project. |
|
NO |
The PATH in your VM, where the Simulation Lib files are stored (Vivado only). |
|
NO |
If this variable is set to |
|
NO |
If this variable is set to |
|
NO |
MANDATORY for Libero SoC. Path of installed |
|
YES |
Your service account name for GitHub (e.g. |
|
NO |
Should contain the Xilinx license servers, separated by a comma. You can also use the standard Xilinx variables to set up your licenses.[^license] |
And finally, this is the list of inputs:
Name |
Required |
Value |
|---|---|---|
|
NO |
The list of projects to build. |
|
NO |
Should be set to |
|
NO |
Should be set to |
|
NO |
Number of CPU jobs for the IP synthesis. Default: 4. |
|
NO |
Number of CPU jobs for the synthesis and implementation. Default: 4. |
|
NO |
If this variable is set to |
|
NO |
If this variable is set to |
|
NO |
If this variable is set to |
|
NO |
This variable can be set to 0, 1 (default), 2, or 3. It specifies the amount of messages that Hog will write into the pull request page. If set to 0, Hog will not write any message. If set to 1, a single message with a version and resource summary for all built projects is written. If set to 2, a short message declaring that the pipeline passed is written. If set to 3, Hog will write one message per successful project. |
|
NO |
Should be set to |
|
NO |
The list of projects to simulate. |
Main pipeline YAML Configuration#
You should also have a configuration file for the Main pipeline. .github/workflow/hog-main.yml looks like:
name: Main

# Define the name of the branches for which you want Hog to create a Tag
on:
  push:
    branches:
      - master
      - develop
      - release
      - develop

jobs:
  hog-workflow:
    # Here you can change the Hog version to use
    uses: hog-CERN/Hog/.github/workflows/Hog-main.yml@Hog2024.2
    secrets:
      HOG_PUSH_TOKEN: ${{ secrets.HOG_PUSH_TOKEN }}
      HOG_EMAIL: ${{ secrets.HOG_EMAIL}}
      HOG_USER: ${{ secrets.HOG_USER}}
Here, you can define the branches for which to run the main pipeline in the on: push section:
on:
  push:
    branches:
      - master
      - main
      - release
      - develop
Similarly to the pull request pipeline, also the main pipeline requires a list of inputs and secrets to operate.
Main pipeline Secrets#
Name |
Required |
Value |
|---|---|---|
|
YES |
The push token you generated for your service account. It can be generated from https://github.com/settings/tokens, and should have project, repo and workflow rights. |
|
YES |
Your service account’s email address (e.g. service_account_mail@cern.ch). |
|
YES |
Your service account name for GitHub (e.g. |
Tag pipeline YAML Configuration#
Finally, a .github/workflow/hog-tag.yml file will configure the Tag pipeline:
name: Tag

# Runs only for tag respecting the v*.*.* format
on:
  push:
    tags:
      - 'v*.*.*'

jobs:
  hog-workflow:
    # Here you can change the Hog version to use
    uses: hog-CERN/Hog/.github/workflows/Hog-tag.yml@Hog2024.2
    secrets:
      HOG_PUSH_TOKEN: ${{ secrets.HOG_PUSH_TOKEN }}
      HOG_EMAIL: ${{ secrets.HOG_EMAIL}}
      HOG_USER: ${{ secrets.HOG_USER}}
    with:
      HOG_CREATE_OFFICIAL_RELEASE: True
      HOG_OFFICIAL_BIN_PATH: "/path/to/store/official/binaries"
      HOG_USE_DOXYGEN: "1"
Here, you can the wildcard of the tags that should run the Tag pipeline. We reccommend to keep the v*.*.*, since these are the tags automatically created by Hog. If you want to run this pipeline also for other tags, add other lines with the chosen wildcard (e.g. my_tag*).
on:
  push:
    tags:
      - 'v*.*.*'
      - 'my_tag*'
Similarly to the pull request pipeline, also the main pipeline requires a list of inputs and secrets to operate.
Main pipeline Secrets#
Name |
Required |
Value |
|---|---|---|
|
YES |
The push token you generated for your service account. It can be generated from https://github.com/settings/tokens, and should have project, repo and workflow rights. |
|
YES |
Your service account’s email address (e.g. service_account_mail@cern.ch). |
|
YES |
Your service account name for GitHub (e.g. |
|
NO |
Set the EOS instance. If your EOS storage is a user storage use |
|
NO |
The name of your CERN service account . Only required if you are using the EOS storage cloud space. |
|
NO |
The password of your CERN service account (should be masked). Only required if you are using the EOS storage cloud space. |
Main pipeline Inputs#
Name |
Required |
Value |
|---|---|---|
|
NO |
If this variable is set to |
|
NO |
Should be set to |
|
NO |
The path for archiving the official binary files of your project. If it starts with |
GitHub Repository configuration#
Merge Commit handling on GitHub.com#
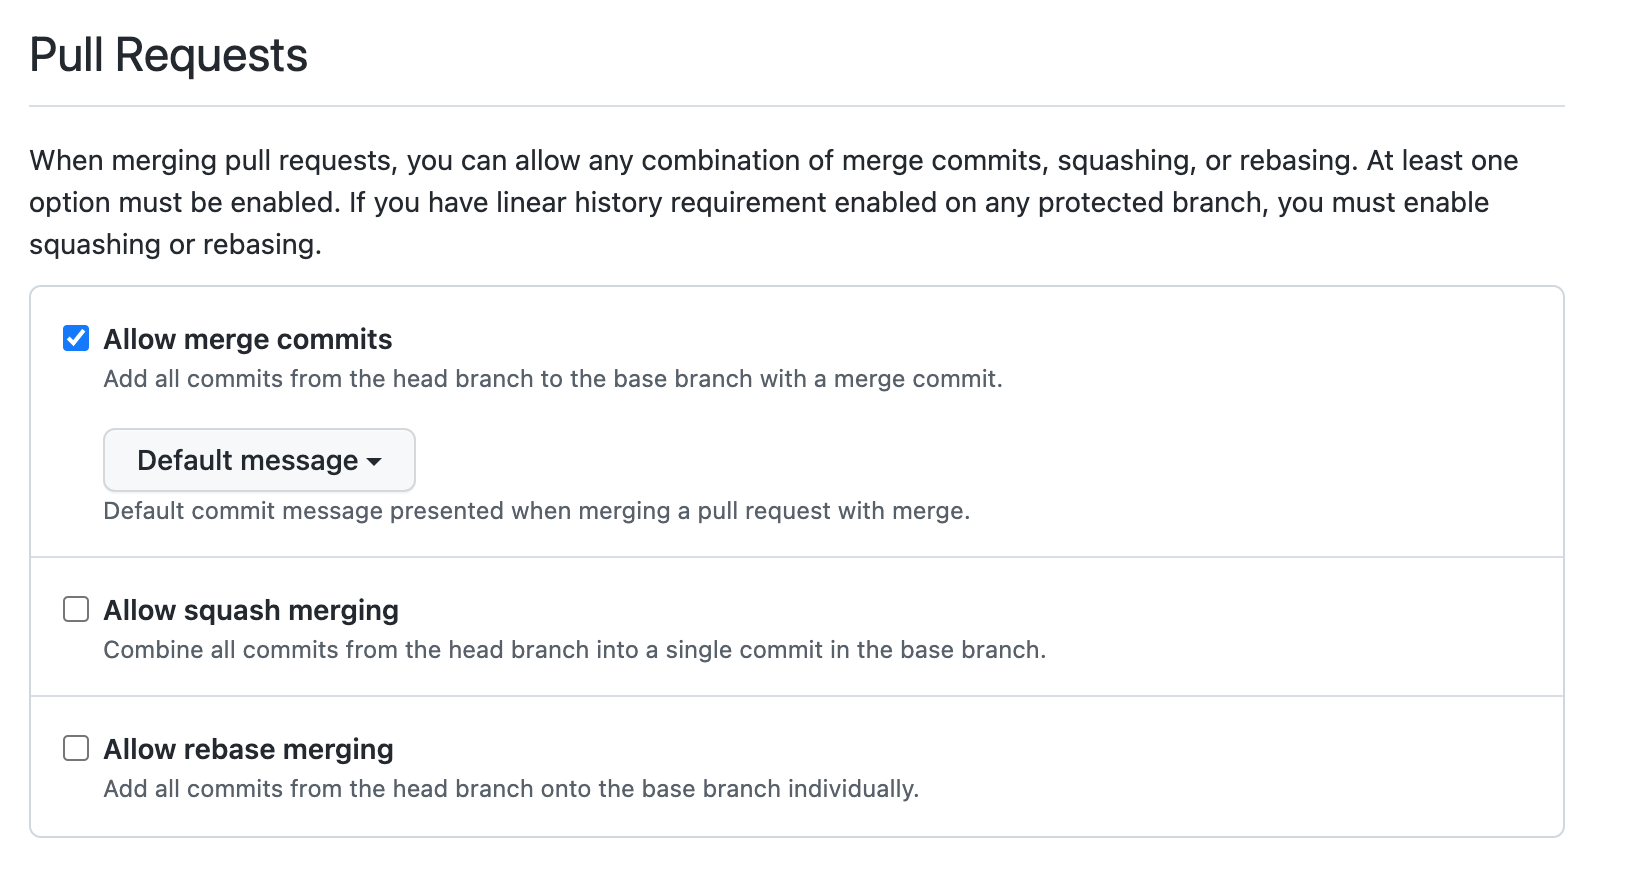
Unfortunately, on GitHub.com is not possible to merge a pull-request with a fast-forward method. Hog emulates this behaviour by deleting the merge commit, when the pull request is merged. For this reason, the repository must be set up in the following way
Go to https://github.com/MyGroup/MyProject/settings
Go to the Pull Request section
Select Allow merge commits with Default message
GitHub actions configuration#
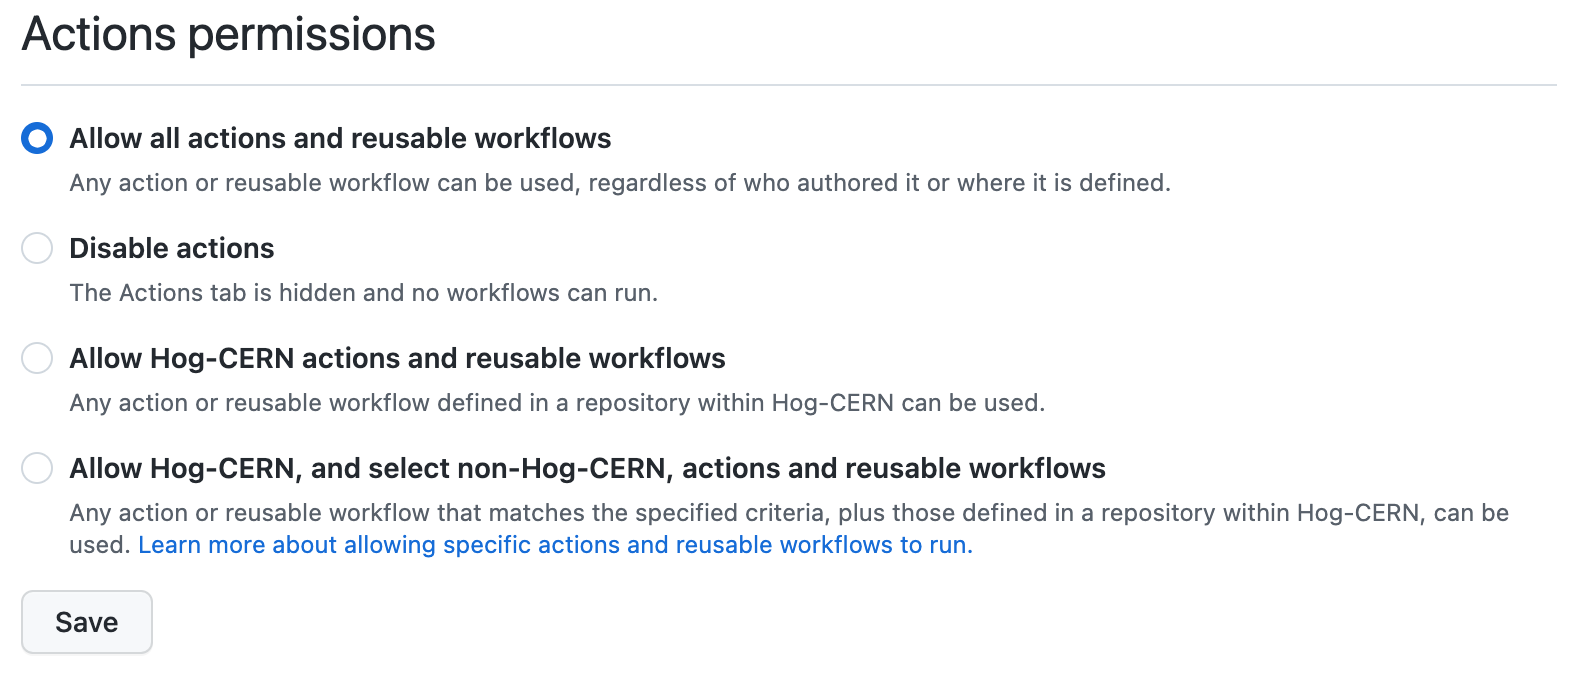
We need to allow the repository to use the reusable workflow provided by Hog.
Go to https://gitlab.com/MyGroup/MyProject/settings/actions
Go to Action permissions
Select Allow all actions and reusable workflow
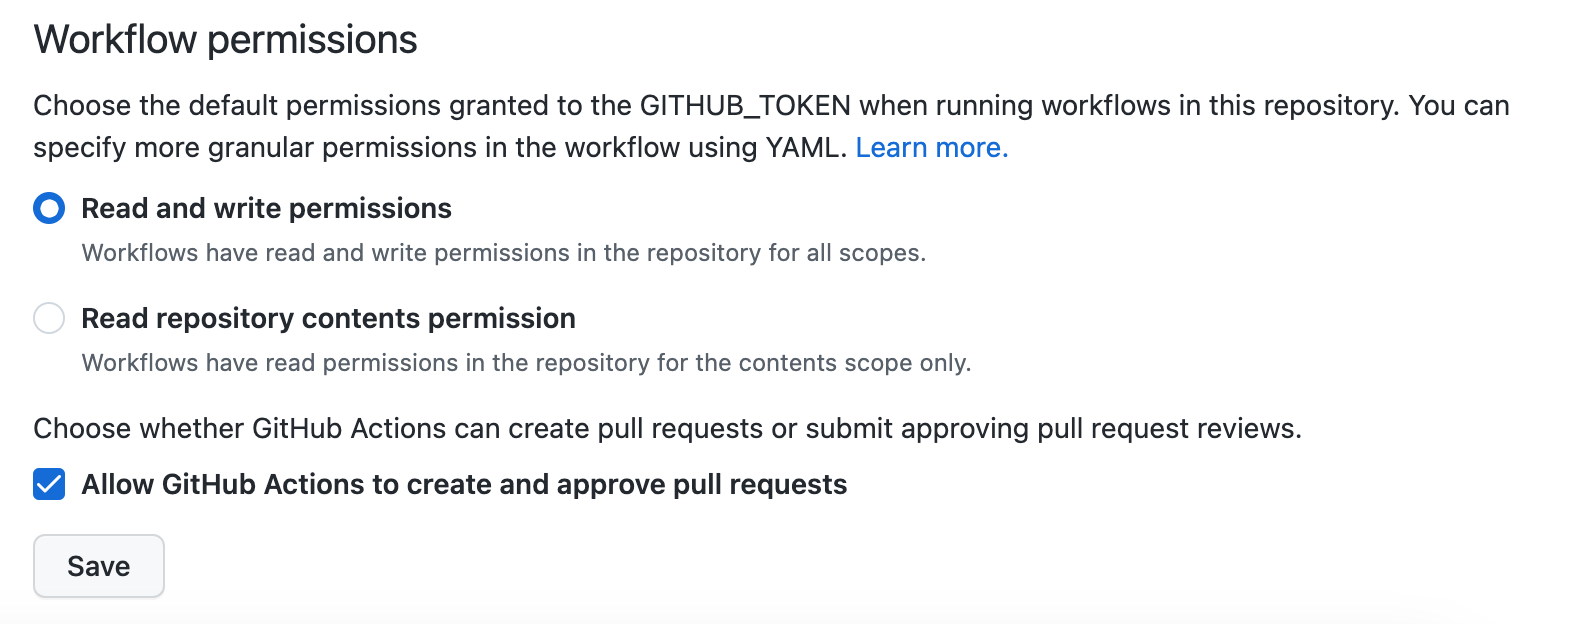
The CI shall have write to permissions to create tag and remove merge commits. This can be set up in the following way.
https://gitlab.com/MyGroup/MyProject/settings/actions
Go to Workflow permissions
Select Read and write permissions
Set-up Runners#
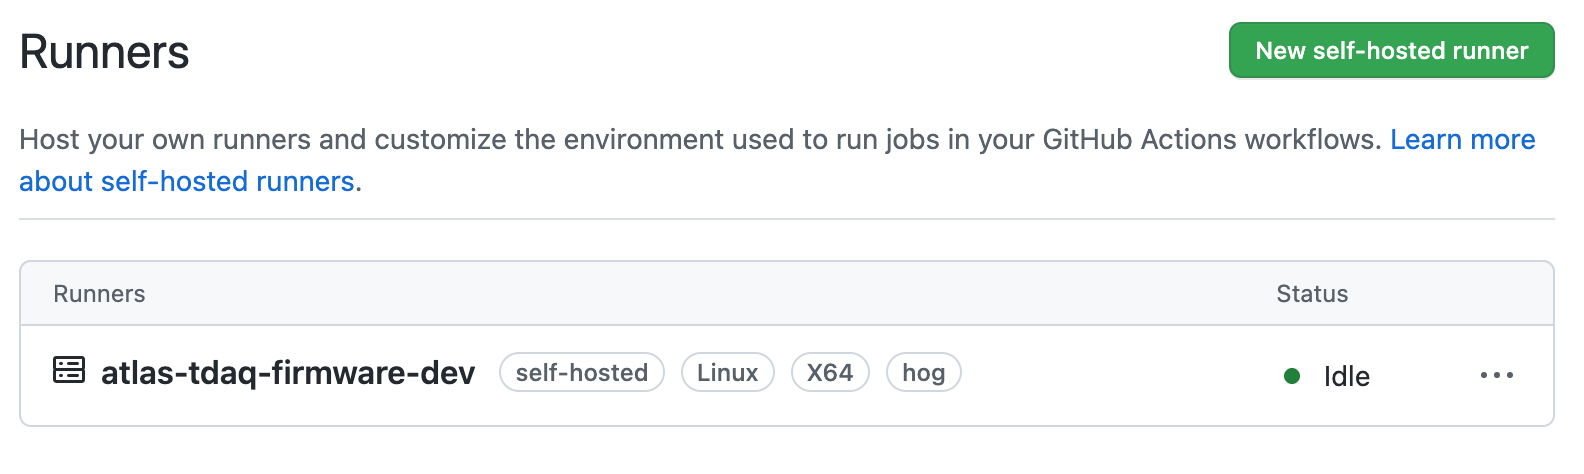
Unfortunately, we cannot use shared runners for every CI job, as the necessary software (Xilinx Vivado, Mentor Graphics Questasim, etc.) are not available. The download, installation and licensing processes would have to be done at each time that the CI is started, slowing down the entire process. As a consequence, you need to set-up your own physical or virtual machines. To set up your machine as self-hosted GitHub runner for your repository, you should:
Go to https://gitlab.com/MyGroup/MyProject/settings/actions/runners
Click on the
New self-hosted runnerbuttonFollow the instructions for your system
Remember that to run Hog, in addition to your chosen IDE, a recent version of git (>2.9.3) must be installed on your private machine. Once the GitHub runner is successfully installed, it will appear in the runners section as in the following screenshot.
Archive binary files on EOS space (Optional)#
The Hog CI will produce some artefacts. These include the resulting binary files of your HDL projects and, optionally, the Doxygen documentation html files. Hog has also the ability to copy these files into a desired folder, either on the local build machine or, if working at CERN, on the EOS cloud storage.
To enable this feature, we have to specify the GitHub HOG_OFFICIAL_BIN_PATH secret. If this variable starts with /eos, Hog will understand that it is a EOS folder and will copy the binary there using the eos client software, which must be installed on your local machine. To work, you need also to setup the EOS_MGM_URL secret accordingly.
If you wish to have your files to be accessible in a web browser, you should create a web page in EOS, following these instructions. For a personal project, by default, the website will be stored in /eos/user/<initial>/<userID>/www. The Hog EOS paths must be then sub-folders of the website root path. To expose the files in the website, follow these instructions.
Speed up the IP synthesis (Optional)#
In order to save resources and possibly speed up the workflow, the products of the IP synthesis can be copied into an external directory, and retried before starting the synthesis. The external path is specified via the HOG_IP_PATH variable.
The IPs are archived in the IP path using the md5 hash of the .xci file, so if an IP is modified, it will be copied again.
It is recommended to clean the IP path regularly as Hog will not delete old IP products.
Storing IPs on EOS
Staring from the version 2022.1, Hog automatically detects if the IP storage path is on EOS or on the running machine, verifying that the path starts with /eos/ or not.