Creating, building and simulating projects#
Warning
Outdated Documentation! This documentation version is out of date. Please check the latest version 2026.1.
Hog provides a series of bash scripts to create, build and simulate your projects. You are not obliged to use them and you are free to use the Vivado/Quartus GUI or Tcl console instead.
Create project#
This section assumes that all the Hog list files and the project .tcl file have been configured as described in the previous sections.
The project can be created using “shell” or Vivado/Quartus Tcl console. By “shell” we mean a bash shell on Linux systems or a git shell on Windows.
Using shell#
Open your shell, go to your project path and type:
./Hog/CreateProject.sh <project_name>
If you do not know the name of your project, simply issue the command without any argument and it will return the list of projects that can be created.
./Hog/CreateProject.sh
The project will be created in Projects/<project name>.
These directories should be ignored in the .gitignore file to avoid to accidentally commit the to the repository.
Using Vivado/Quartus Tcl console#
You can also source your project .tcl script directly from the Vivado/Quartus Tcl console, by issuing this command:
source Tcl/<project_name>/<project_name>.tcl
Building the HDL project#
By “building” or “workflow” we mean the complete build of the project: IP synthesis, Synthesis, Implementation, and binary file generation.
Workflow launcher#
In previous version of Hog (up to Hog2020.1), there were several scripts to run the different steps of the workflow.
From version Hog2020.2 (v2.0.0), Hog provides one unified launcher script able to launch the complete workflow or intermediate steps depending on the options.
The shell launcher is Hog/LaunchWorkflow.sh that is a wrapper for the Tcl launcher Hog/Tcl/launchers/launch_workflow.tcl.
Here follows the usage:
USAGE: Hog/Tcl/launchers/launch_workflow.tcl [OPTIONS] <project>
Options:
 -ip_eos_path value   If set, the synthesised IPs will be copied to the specified EOS path. <> (Not available under Quartus)
 -no_bitstream        If set, the bitstream file will not be produced.
 -synth_only          If set, only the synthesis will be performed.
 -impl_only           If set, only the implementation will be performed. This assumes synthesis should was already done.
 -no_recreate         If set, the project will not be re created if it already exists.
 -reset               If set, resets the runs (synthesis and implementation) before launching them (Not available under Quartus).
 -check_syntax        If set, the HDL syntax will be checked at the beginning of the workflow.
 -njobs value         Number of jobs. Default: 4 <4>
 -ext_path value      Sets the absolute path for the external libraries. <> (Not available under Quartus)
 -help                Print this message
 -?                   Print this message
Running the workflow from a shell#
Open your shell and type:
./Hog/LaunchWorkflow.sh <project_name>
This will run the complete workflow up to the binary file generation. The project will also be created, if that was not previously done.
If a run (synthesis or implementation) was already done for the specified project, the option -reset is needed to forcefully re run it.
If the project was already created and you do not wish to overwrite it (and save some time) you can use the -no_recreate option.
Running the workflow using Vivado/Quartus GUI#
In a Hog handled project, the firmware workflow can always be run normally from the IDE (Vivado, Quartus) GUI, Hog integrated scripts will run automatically.
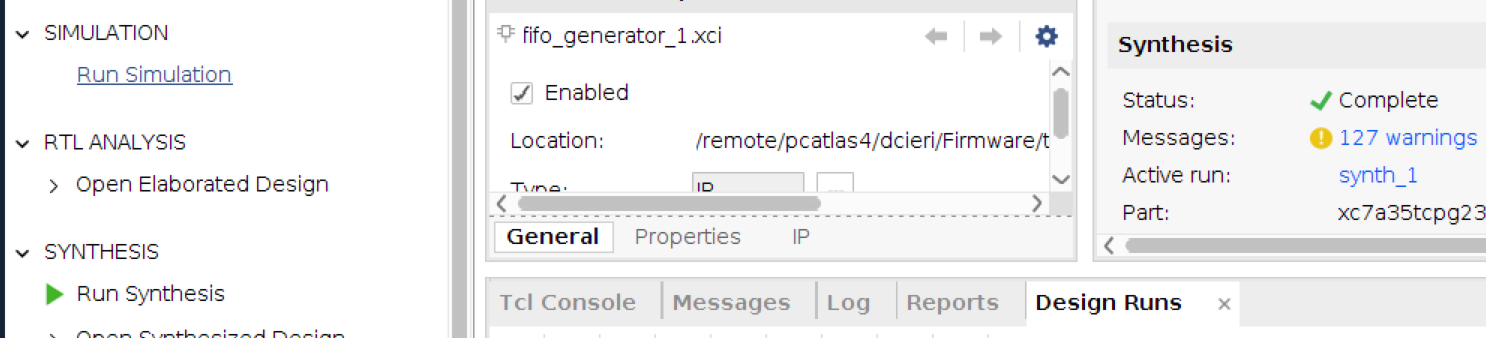
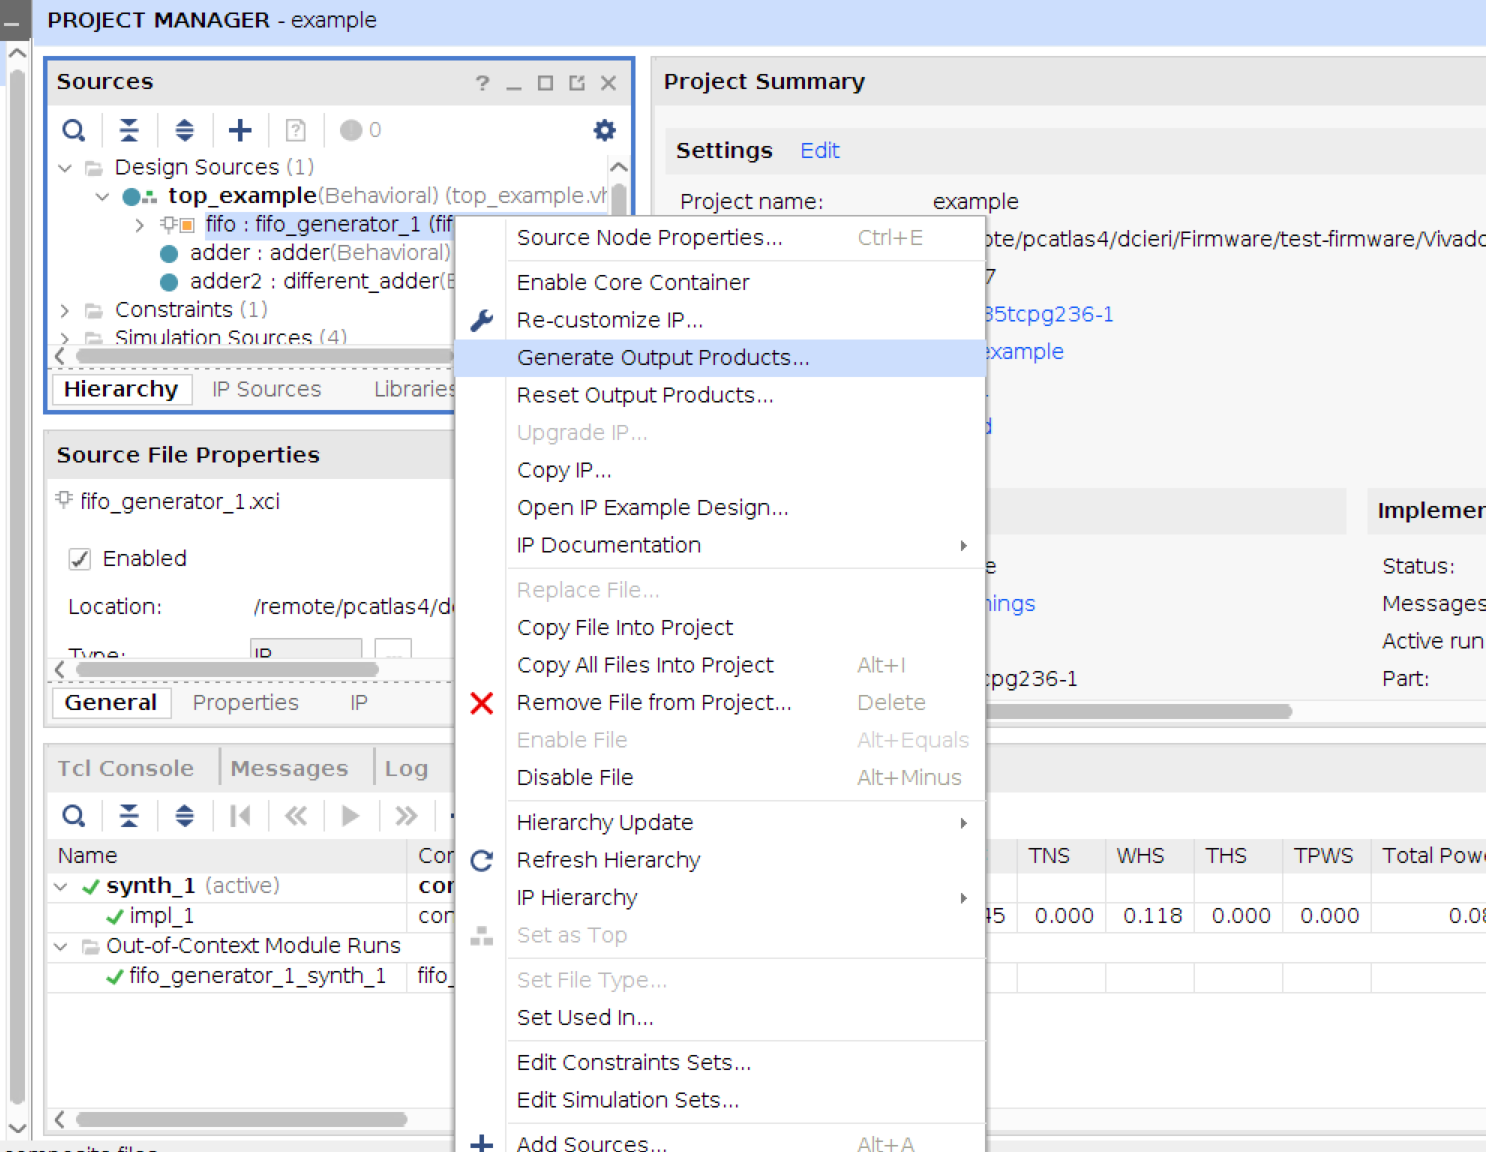
To run the IP synthesis, for example, right click on each IP and click the “Generate Output Products” button.
To synthesise the project, click on “Run Synthesis” button (on the left).
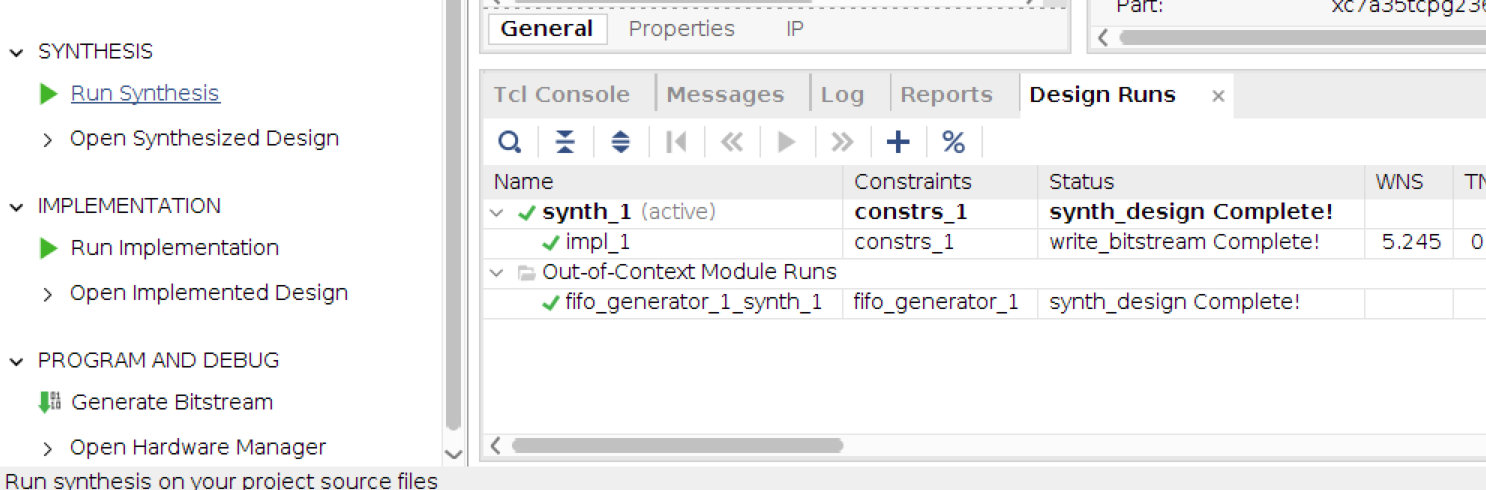
Finally, click on “Run Implementation” and “Generate Bitstream” buttons (on the left).

Note
Under Quartus always run a full compilation flow after recreating a project. Running a single module will cause errors due the Hog generics not being set to any value[1].
Collecting workflow products#
After the firmware workflow is completed, Hog will automatically copy many relevant files to the bin directory in the root of your repository. This folder should be ignored by git by means of the .gitignore file.
The files copied into the bin directory are:
The binary files (.bin and .bit) properly renamed according to the
git describe(optional) The .ltx ILA files (if ILA cores are used in the project)
All the reports produced during synthesis and implementation
(Vivado only) All the
runme.logfiles produced during synthesis and implementation. They will be renamed according to the run name(optional) All the IPbus xml files used in the project, as specified in the
xml.lstlist fileA
versions.txtfile containing all the values of versions, SHAs, time, date that are passed to the top module of the project(Vivado only) In the HOG-CI (or if you launch the workflow with the script) a timing file containing the timing values of the project (WNS, TNS, WHS, THS). The file is called
timing_ok.txtif all the timing requirements were met, otherwise it is calledtiming_error.txt.
Run simulation#
Project simulation can be run using shell, Vivado GUI or Vivado Tcl console. Hog supports Vivado simulator (xsim), ModelSim and QuestaSim. The project simulation is not supported under Quartus, this means you will need to run your simulation as if Hog was not present in your repository.
The simulation files and properties, such as the selected simulator, eventual wavefiles or do files are set as explained in the section Simulation list files. If ModelSim or QuestaSim are used, the Vivado libraries must be compiled by the user in a directory. ModelSim/Questasim libraries can be compiled by using shell command Hog/Init.sh or by using the tcl commands Hog/Tcl/utils/compile_modelsimlib.tcl or Hog/Tcl/utils/compile_questalib.tcl.
If this command is used, the simulation libraries will be stored into ./SimulationLib.
Using shell#
Open your bash shell and type:
./Hog/LaunchSimulation.sh <project_name> [library path]
The option [library path] is the path of the compiled simulation libraries. Default: SimulationLib.
This command will launch the simulation for each .sim list file in your project with the chosen simulator(s).
Using Vivado GUI#
Using the GUI, you can run only one simulation set at the time. First of all select the simulation set you want to run, by right clicking on simulation set name in project sources window.

Then click on “Run Simulation” button (on the left). Note that using the GUI, Vivado or Quartus will use the simulation software specified in your project .tcl file